Showing posts with label recipe. Show all posts

Thursday, October 8, 2009

Braided Bread


A creative way to spend a lazy afternoon. I had the sudden urge to make bread over the summer, after rereading the FamilyFun book. I found that the recipe provided was indeed quick and easy,
Be warned though, this recipe is extremely time consuming and should only be made when you have 3 hours to spare. The recipe can be used to make other kinds of breads, this recipe is just the beginning.
Original recipe is from the 1996 FamilyFun Cookbook

Ingredients
2 cups of warm water*
1 tbsp active dry yeast
1 tbsp sugar
5 1/ 2 to 6 cups of all-purpose flour
2 tsp of salt

Egg wash:
1 egg
1 tbsp of water

*by warm, I mean it's warm enough to be comfortable on your wrist and not burn it off!

Add the yeast and sugar to the warm water and whisk them together until dissolved.

Measure 2 cups of the flour and add to the bowl. Whisk the mixture well and let it set for 10 minutes until it has expanded and is bubbling slightly (this is called proofing, mind you).

Stir in the salt, then add the remaining flour a cup at a time, making it now into a dough of sorts.

Remembering to flour your workspace, transfer the dough and knead for 10 minutes until elastic and smooth. Roll into a ball.

Grease the ball with vegetable oil completely and cover with a damp cloth or plastic wrap (paper towels work too) in a draft-free area (like your fridge) for 2 hours or until doubled in size.

Punch down the dough and knead it again to get rid of any air bubbles.

Cut it in half and again into three parts. Roll them into 10 inches of length. Braid from the center to avoid tearing and pinch at each end. Repeat for the other half or store for another creation you might want to make (it stores for up 6 months frozen).

Preheat an oven to 400°F. Place the loaf(s) on a greased baking sheet. Make the egg wash by whisking the egg and water together, and brush on the dough.

Bake for 25 minutes. Serve with your favorite butter, oil or jam and enjoy!

Makes 2 loaves.

Note: The dough freezes quite well in an airtight container and lasted a good 3 months before I used the other half.

Alternatives

Fruit bread: while adding the flour in the mixing stage, add 1 cup dried fruit like prunes and cherries and mix well.
Cinnamon: add 1/ 4 cup of ground cinnamon on the mixing stage.
Banana nut: add 2 mashed bananas with 1/ 2 cup of chopped almonds and a generous tbsp of cinnamon sugar to the mixing stage.
Cheesy crust: Just before baking, sprinkle your favorite grated cheese over the top of your dough.

Braiding on Foodista

Monday, October 5, 2009

Chocolate cupcakes with lemon filling

There's something about Sundays that just motivate me to cook a nice full meal. This week I made some mini pepper and cheese burgers with fried julienne-sliced red potatoes. My boyfriend (and sous chef I might add) and I like to make these together when the upcoming week is pretty mellow.

For dessert, I made chocolate cupcakes, since I've ended up being drawn to making cupcakes now (late for the bandwagon I'm sure).

Ingredients
1 egg
1/3 cup of self rising flour
1/2 tsp of vanilla extract
1/4 tsp of almond extract
1/3 cup of caster sugar
1/3 cup of butter, softened
1/8 cup of milk
4 tbsp of chocolate powder

1 tbsp of vegetable oil

Lemon buttercream filling
1/3 cup of butter
Zest of 1 lemon and half its juice.

Preheat the oven to 320° F. Line the cupcake tray with non-stick spray.

In a small bowl, lightly beat the egg, add the butter and sugar, then mix until light and fluffy. Add the milk, flour, both extract and chocolate powder, and stir to combine. Whisk until the consistency is light and creamy.

Divide the mixture evenly between each hole (about 3/4 of the way up, to leave space for their expansion). Bake for 15-18 minutes until risen and firm to the touch.

Allow the cupcakes to cool down and rest on a wire rack until they are ready for the filling.

The naked cupcakes with little Eggsworth

While the mini cakes are cooling down, combine the sugar, butter and lemon juice and zest with a spoon (wooden recommended) until well mixed, then whisk until light and fluffy. Spoon mixture into a piping bag with a medium star nozzle (I used a simple Ziplock bag with a corner cut) and set aside until said cakes are cool enough to avoid melting.

When done cooling, make a small whole and squeeze the filling into the cupcakes and pipe as cover. Enjoy with a cold glass of milk!


Ta da!

Sunday, September 13, 2009

Frutezia cupcakes

Because I "don't" have enough things to do when I'm bored (says the girl who has two perspective drawings to do).
After shopping around with a friend of mine, I found this delightful gift set:
Instant love for this!

and bought it immediately. It's a fully equipped set for the beginning cupcake cook (like me) with: a silicon 4-cup tray, a piping bag, four different nozzles and a small 48 page cookbook. Curiosity begged me to try it out ASAP as the beautiful pictures captivated my imagination. Since my boyfriend's roommate has an overstock of a particular light wine that no one likes, I decided to use it in the culinary pursuit of alcoholic cupcakes.

Vineyard Blend Frutezia(c) Cupcakes
(referenced here is "Cupcake Creations" by Hinkler Books)
Ingredients:
-1 egg
-1/3 cup sugar
-1/3 cup of butter, softened
-1/6 cup of milk (fill half a 1/3 cup)
-1/2 cup of self rising flour, sifted
-2/3 tbsp of Vineyard Blend Frutezia Wine*

Topping
-1/3 cup of icing sugar (note: since I had none, I used regular sugar, it will be grainy, but just as delicious)
-1/3 cup of butter, softened.
-1/2 tbsp of Vineyard Blend Frutezia Wine
-Cinnamon sugar (found in your local supermarket's spice aisle)

Preheat the oven to 320° F. Line the cupcake tray with non-stick spray.

In a small bowl, lightly beat the egg, add the butter and sugar, then mix until light and fluffy. Add the milk, flour and Frutezia and stir to combine. Whisk until the consistency is light and creamy. If you like, add a few drops of food coloring to make a bigger visual impact.

Divide the mixture evenly between each hole (about 3/4 of the way up, to leave space for their expansion). Bake for 15-18 minutes until risen and firm to the touch.

Allow the cupcakes to cool down and rest on a wire rack until they are ready for the frosting.
They look naked don't they?

While the mini cakes are cooling down, combine the sugar, butter and wine with a spoon (wooden recommended) until well mixed, then whisk until light and fluffy. Spoon mixture into a piping bag with a medium star nozzle (I used a simple Ziplock bag with a corner cut) and set aside until said cakes are cool enough to avoid melting.

When done cooling, pipe the icing onto the cupcakes and sprinkle on some cinnamon sugar to finish. Do enjoy with a cold glass of milk or wine!

Makes 4

*NOTE: The wine used can be replaced with your favorite liquor, just be careful with its strength as it might easily overpower the sweetness in the cupcake.

Saturday, September 12, 2009

College style Pasta Carbonara


One of my personal favorites to cook when hunger strikes. My mother makes an amazing plate of the stuff with garlic bread that keeps you wanting more. After two years of failing miserably on my own, she finally told me the secret: white cooking wine and an egg.
Serves 2
Ingredients
-A generous handful of long pasta, like spaghetti
-4 to 6 slices of bacon
-1 tsp of crushed garlic
-1/3 cup of Parmesan or Italian cheese, plus more for serving
-1/3 cup of cooking wine
-1 tbsp of Italian seasoning or oregano if unavailable.
-1/4 cup of vegetable oil I actually replaced this with 1 tbsp of unsalted butter
-1 tsp of salt
-1 tsp of ground black pepper
-1 egg
Boil enough water in a sauce pot to reach three-fourths of its height, adding 1 tsp or 2 of salt. On a skillet, start boiling 1 /4 cup of water to cook the bacon.
While the water boils, cut the slices of bacon into small pieces and slightly season them with the Italian seasoning. To start cooking the ham, add it to the skillet with the white wine , black pepper and the rest of the seasoning. Cover immediately to prevent the alcohol from evaporating.
When the water is boiling (or when the big bubble stream is constant), add the pasta and the oil. Cooking time is at your discretion, but here's a quick guide to get certain firmness:
-8 minutes: Al dente
-10 minutes: firm
-12 minutes: tender
Meanwhile, crack the egg and beat it slightly (as if making a fritatta). After pasta is cooked, drain the water from the pot and place back into the sauce pot.

Working quickly, add the bacon, cheese and egg together and mix until egg's solidified and cheese has melted.
Serve hot with some extra cheese and enjoy.

Carbonara on Foodista

Saturday, August 8, 2009

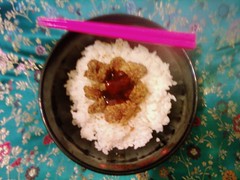
Karaage with steamed rice


Karaage with steam rice
Originally uploaded by bunnyq.lita

A quick, easy and incredibly tasty way to finish up any leftover raw chicken.

Karaage is Japanese-style chicken nuggets, usually served with lemon and eaten all year long and a good bento standby.

The recipe used is from "The Manga Cookbook" by Yoko Ishihara

Karaage
1 lb of boneless chicken thighs
1 1/2 cups of cornstarch/cornflour (or enough to coat the chicken)
1 lemon
1 cup of vegetable oil (or enough to cover the chicken)

For the marinade
1/2 cup of soy sauce
1 tsp of freshly grated ginger
2 cloves of garlic (or 1 tsp of garlic paste)

Steamed Rice
1 1/2 cups of medium grain rice
2 cups of water
1 tbsp of vegetable oil
salt for taste

Place the garlic, ginger and soy sauce in a container with lid to make the marinade for the chicken.

Cut said poultry into bite-sized portions and toss them inside the CLOSED container (unless you want to clean up soy from your kitchen and clothes). Let it sit in the refrigerator for 30 minutes.

While the chicken marinades, start boiling the water with the rice, oil and salt for about 20 minutes, making sure to move it along to speed up and completely cook it.

Transfer the chicken into a ziplock bag with the cornstarch (or another container) and shake until the chicken is throuroughly covered.

Heat up the oil in a large pot (I use a wok for my frying) on medium heat and slowly add the chicken. Fry until it's golden brown. Remove from pot and place on paper towels to drain the oil.

Cut the lemon and squirt the juice on top of the chicken to finish!
Note: You can skip the lemon all together, as I did. It will be just as delicious!

Chicken Karaage on Foodista

Friday, July 31, 2009

Pepper and cheese hamburger patties

A quick, healthy and much more satisfying way to spruce up your cheeseburger


Pepper and cheese patties
-1lb of ground meat
-1 red pepper
-1 green pepper
-1/2 cup of assorted grated cheese
-2 tbsp of vegetable oil
-salt and pepper for taste

Before you start handling the meat, chop the peppers into tiny pieces and separate them. Take a handful of ground meat, divide into two and mould into patties.

Place the minced peppers, cheese and season on one patty and cover with the other one (or just cover with the same one).

Heat up the vegetable oil and cook the patties until it's crisp and well done (this is arbitrary to one's preferences). Serve alone or prepare to your liking.

EDIT 2009/10/4: To make mini burgers use a clean cookie cutter about 2 inches in diameter to cut nice, and even patties.

Added here is my home made cheese bread bun

Wednesday, July 8, 2009

DIY Malasadas//Pancake Puffs

Ever been to Denny's recently? Their pancake puppies are probably my favorite thing on the menu. I figured I could surprise my boyfriend when he came over for dinner (detailed on another post). Ever since then, I’ve been making up new ways to make these convenient snacks more delectable than the last batch.

DIY pancake pups*
Makes 10 puffs **
1/2 cup of preferred pancake mix (I used Buttermilk)
1/3 cup of milk
1/4 cup of all purpose flour
1/4 tsp of vanilla extract
3/4 cup of vegetable oil
Pancake syrup

**To make more, simply double all ingredients.

To make the dough, mix the pancake mix with the milk and vanilla until creamy with a whisk. Add the flour to add texture and stability to the mix (you’ll thank me later when frying). If still liquid, add 1/4 cup more.

Note that you can add whatever you like in the dough for flavor, like caramel or fruit, as long they’re not too hard.

Once the dough’s ready (should be easy to mold and shape), dust some flour on your hands and a dessert spoon. Use the spoon to scoop out some dough and use your hands to make them into little balls.

Heat the oil in a saucepan (recipe works with a deep fryer as well!). Fry up those puffs until crisp and golden on the outside; they'll be soft and fluffy on the inside.

Enjoy and remember to share the fluffy goodness!

*Pancake Puppies ® Denny's*
Note: The puppies are actually known as malasadas, a type of Portuguese donuts

Wednesday, July 1, 2009

Cream Pudding covered with Meringue


Little egg-y wonders

Very egg-y and simple dessert that impressed my friend who came over way back in April. I'll update this recipe as soon as I can.

Recipe's based on two found in "The Essential Dessert Cookbook".

Custard:
3 egg yolks
2 tbsp sugar
1 1/2 cup milk
2 tsp vanilla extract

Meringue topping
4 egg whites
1 cup of sugar

To start, separate 4 eggs. Since we'll be using all of the eggs, store the whites separately for later. Boil the milk in a large saucepan on medium-high, being careful not to let it curl (it shouldn't take more than 7 minutes). Should it curl, stir it lightly until the thin film of curd is gone.

While the milk's getting ready, whisk the eggs and sugar until it's light and creamy (takes about 10 minutes by hand). Slowly pour the mixture into the milk and let it cook for 5 minutes until pale and thick, stirring it constantly. About 2 minutes before the cream's ready to bake, add the vanilla extract.

Get the hot bath ready by placing 4 ramekins into oven-safe soup bowls. Fill the bowls with boiling water up to halfway up the ramekins height. Pour the cream into each ramekin.

While they start cooking on their own, whisk the egg whites and the sugar until stiff white peaks form. Scoop the mixture onto the ramekins, being careful not to mix them. Place the plates onto a baking sheet and bake until the meringues are golden brown.

Enjoy!

Monday, June 29, 2009

Homemade Ravioli

One of the many recipes I have backlogged in my primary blog that I would love to go into deeper is the homemade ravioli I made back in April (I'll cover the custard on another post). The dough is a universal recipe, but credit due to Tyler Florence for this one.

Homemade ravioli stuffed with cooked ground meat
Serves 5-6
For the pasta:
3 cups all-purpose flour
1 teaspoon salt
4 eggs
2 tablespoons olive oil
1 yolk, for egg wash

For the filling:
1/2 pound of ground meat (93%)
1/2 white onion
1 green pepper
1 red pepper
1 tablespoon of butter
1 can of tomato paste
1 tsp of garlic paste
2 tbsp of "sofrito" (traditional recipe)
a pinch of salt

Sift through the flour and add the salt. Make a small well inside the flour and add the 4 eggs and oil. Slowly cave in the flour and knead the subsequent mixture until stretchy (remember to flour your hand to avoid sticky messes).

Cut the ball of dough in half, cover and reserve the dough you are not immediately using to prevent it from drying out. Dust the counter, rolling pin and dough with flour. Flatten the dough to 1/8" thickness.

Beat 1 egg with 1 tablespoon of water to make an egg wash. Lay out the long sheet of pasta, and brush the top surface with the egg wash, which acts as a glue.

Start by melting the butter and "sofrito" and tomato paste in a medium to large skillet.

Chop the onion, peppers and sautee them in the skillet until the onions are golden brown. Once done, cook the meat in the mixture until fully cooked.


Drop tablespoons of the filling on 1/2 of the pasta sheet, about 2-inches apart. Fold the other 1/2 over the filling like a blanket. fingers, gently press out air pockets around each mound of filling. Use a sharp knife to cut each pillow into squares and crimp the 4 edges with the tins of a fork to make a tight seal.

Cook the ravioli in plenty of boiling salted water for 4 minutes; they'll float to the top when ready.

It was a huge hit with my guest for the night, so I hope you all enjoy!

Saturday, June 27, 2009

Cheesy BLT salad with Ceasar dressing


Let's start this blog up with a recent recipe!

Quick, relatively inexpensive to make, it quickly became my favorite salad to make (coming from someone who wouldn't touch a salad a month or so ago).

Cheesy BLT salad wih Ceasar dressing
Serves 2
  • Lettuce leaves (for a healthier version, use spinach leaves)
  • 1 small globe tomato
  • 1/4 cup of Parmesan cheese
  • 1/4 cup of Mozarella cheese
  • 6 strips of smoked bacon*
    *I used Oscar Meyers Fully Cooked bacon for a quick fix.
  • Ceasar dressing

1. Take out a skillet and boil about 1/8" of water in it. Chop the bacon into tiny pieces and cook covered for about 5 minutes and uncovered for another 2 to get it crispy.

2. While the bacon is cooking, wash and cut the tomato as you see fit (personally, I like to cut them into bite size pieces) as well as the lettuce leaves. Make sure the leaves are nice (no blackening) Arrange in two plates.

3. When the bacon is done, scoop the pieces with a spoon and serve over the simple salad. Serve with 1/8 of both cheese on top of each plate and about a tablespoon of dressing.

Simple yes, but an effective meal for people on the move. :D

LinkWithin

Related Posts with Thumbnails